We always recycle our weekly newspapers (minus the comics section which I save) so it's not like its going into the trash exactly, but I was recently feeling that there must be a better use for it. I did some searching and soon became very inspired to use my old newspapers (and cereal boxes, which you'll soon see) as more than just wrapping paper. Instead I made gift bags!
Here's how I did it:
First, pick some newspaper with print that you like. I used some with flowers, produce and comics (which are still my favorite).
Next cut a large rectangle. Mine started out as approximately 25 x 17 inches. Also, I doubled mine making it two-ply for more stability.
Next fold down about 2inches from the top and 1 1/2inches in on the side.
After that measure the length of your paper minus the 1 1/2inch side fold. Mine was 23inches. Then divide into four sides. I wanted my bag to be more rectangular than square so I divided my sides into two 4 1/2inch sides and two 7 inch sides. I marked this on my paper in order to know where to make my next folds.
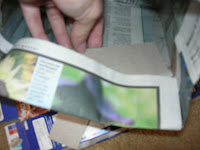
Fold on each of the measured points and then connect the two ends by gluing them together. Also fold the inside edge underneath the top fold (see pictures below).
At this point I folded my bag flat creating creases that will make it easier to fold and store later.
Next I decided how deep I wanted to bag to be and folded there. I then measured down 2 inches (this will be folded to create the bottom in a moment) and trimmed off the excess.
Then fold the bottom in like you would a present and glue into place.
One of the last steps was to reinforce the bag slightly. I grabbed an empty cereal box and cut two 1 1/2 x 7 inch pieces. I slid these under the top fold on the long sides of the bag. I also cut another rectangle to reinforce the bottom of the bag.
Finally punch holes and add cord, ribbon or even shoelaces as handles. TA-DA! You've got a homemade, recycled, no cost gift bag!


No comments:
Post a Comment